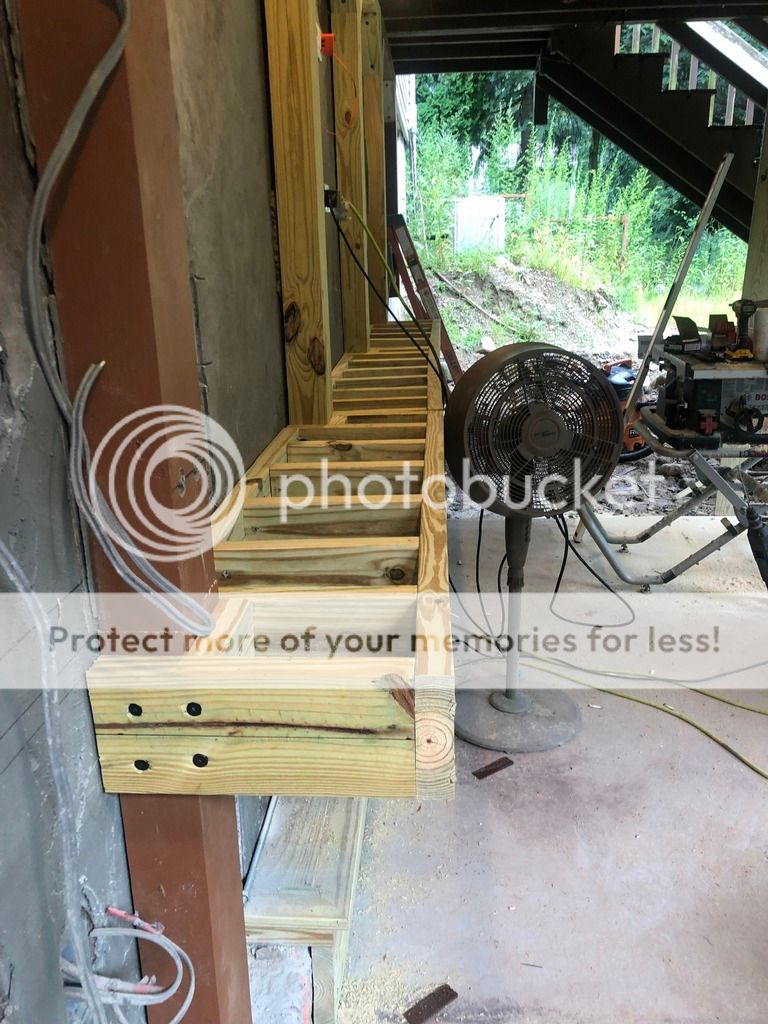
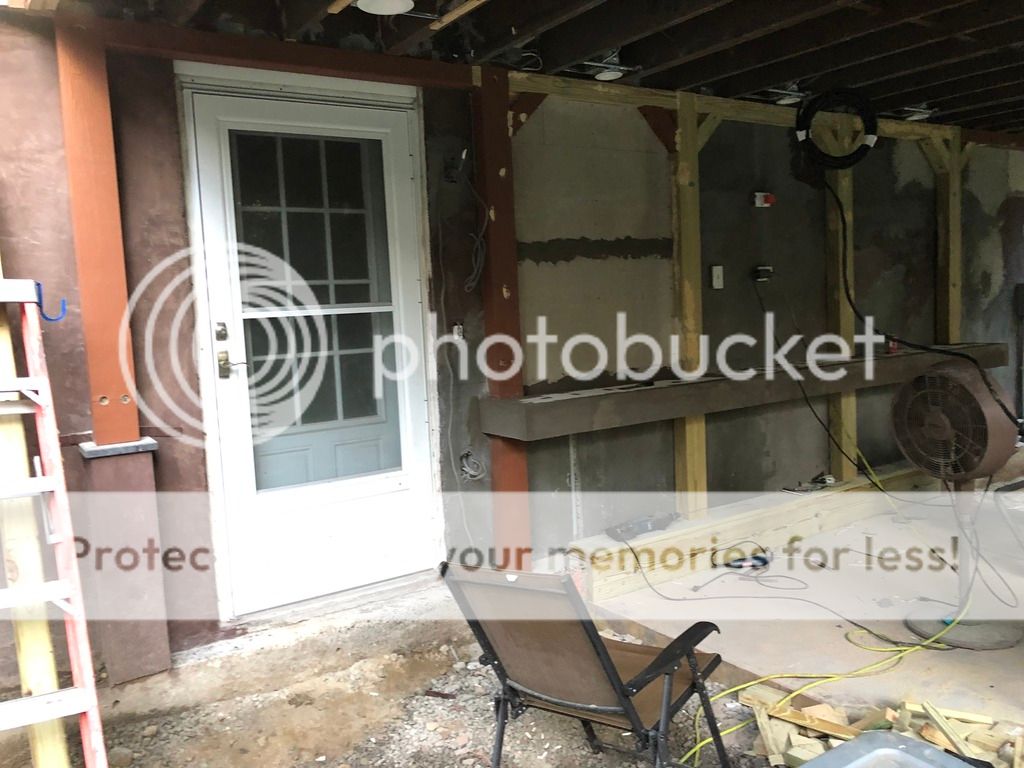
What's the Best Hot Tub

Author Topic: My Underdeck Hot Tub Project  (Read 15069 times)

NBonugli

  • Junior Member
  • *
  • Posts: 26
My Underdeck Hot Tub Project
« on: September 20, 2019, 03:53:19 pm »
Guys,
I just thought you might find my underdeck remodel project at my house interesting. I'm almost completed, I take delivery of the tub October 15th.
Please note that I do realize I went a little over the top with a few things...but eventually this area will be converted into a (3) or (4) season porch/protected area.

First phase: (inspection & demo)
- Clean all the crap from the area
- Inspected wood support posts, all were hollowed out by carpenter ants, and the footings were garbage (bag of quikrete dumped into the hole it seemed like)


=http://s38.photobucket.com/user/nbonugli52476/media/IMG_4064_zps6eflj23j.jpg.html][/URL]

Second Phase: (Rebuild Phase)
- Installed temp post shores to support deck
- Hacked old posts out
- Dug out new footing holes
- Installed rebar cages protected with anti rust coating
- Poured footings and grade beam with composite repair/latex modified pourable repair mortar by Conproco


Third Phase: (Rebuild Phase)
- Excavated asphalt paving under deck
- Excavated crushed stone from under asphalt paving and salvaged crushed stone
- Excavated earth down to bring grade down approx 3'
- Backfilled grade with salvaged crushed stone and compacted bringing up to grade equal to underside of new concrete pad
- Formed for new concrete pad 8" thick, installed full rebar cage with #4 & #5 rebar in about 1' x 1' square pattern (all connections double wrapped with tie wire) and diagonal #5 bar extending to each corner
- Ran conduit for electrical
- Install timbertech 6" fasteners at inside faces of forms that tie back to rebar, tied with tie wire
- Installed foam expansion material at juncture of existing footing to new slab juncture to allow for expansion/contraction
- Poured concrete with on demand concrete truck; 4000 psi concrete; first screeded slab, then bull floated it, mag floated it twice, and then steel troweled it twice (it's pretty smooth)
- Installed recessed weather tight rated 6" can lights at outer perimeter of ceiling with sealed LED 100 watt dimmable fixtures
-Installed recessed weather tight rated 4" can lights at area just above shelf with sealed LED 100 watt dimmable fixtures

(pics of rebar; please note I added quite a bit more after these pics were taken)


(fourth Phase to be posted next)
Nick B - Middleton, MA
« Last Edit: September 20, 2019, 04:04:49 pm by NBonugli »

Hot Tub Forum

My Underdeck Hot Tub Project
« on: September 20, 2019, 03:53:19 pm »

NBonugli

  • Junior Member
  • *
  • Posts: 26
Re: My Underdeck Hot Tub Project (PHASE 4)
« Reply #1 on: September 20, 2019, 03:54:26 pm »
Fourth Phase (Carpentry & finish work):
- Installed 4x6 PT timbers vertical that rest on footing and extend up to and intersect with horizontal 4x4's that rest up against existing PT joists of deck that tie into house; Also installed diagonal members that tie from vertical 4x6 to 4x4 members at each side of 4x6
- 4x6 vertical timbers were also shimmed, drilled, and epoxy fastened into foundation (3/4" fasteners) as well (4 per vertical timber)
- Installed PT lumber to create base for shelf; all timber tech fasteners and main horizontal piece that rests up against foundation wall is through epoxy bolted and drilled into the foundation at about 10-12 locations (I think an elephant could dance on it and it wouldn't budge)
- Installed cement board at top and sides of shelf, taped all seams, and 100% skim coated with latex modified quick set thinset
- Installed 4" cmu solid (2 stack) pier to left of door, with thermal finsih granite cap, skim coated face of CMU solid with a mix of Portland cement, Very fine sand, solomon grind color additive, and latex milk additive.
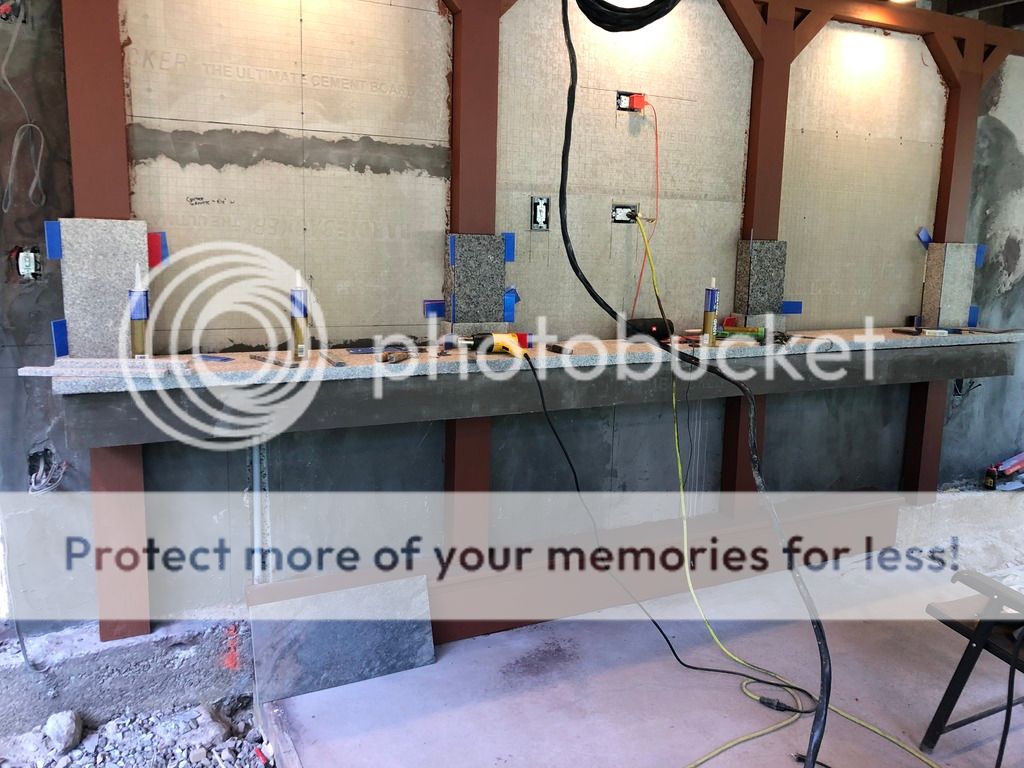
- Installed 2" solid granite pavers with thermal finish to top of shelf (butted all joints); I shimmed them and used fast set epoxy adhesive used to set anchors into concrete - also used heavy duty liquid nails in some locations
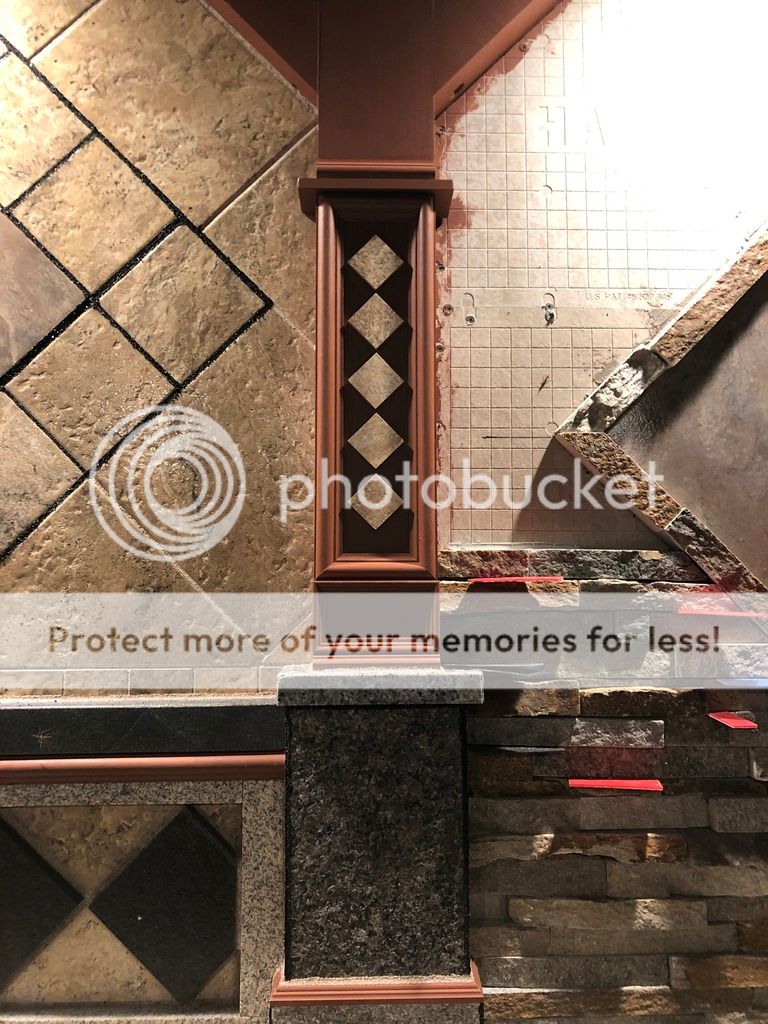
- Cut thermal granite panels to size with mitered edges for base of pier pieces (above shelf); adhered with fasteners into kerf cuts at backs of stones
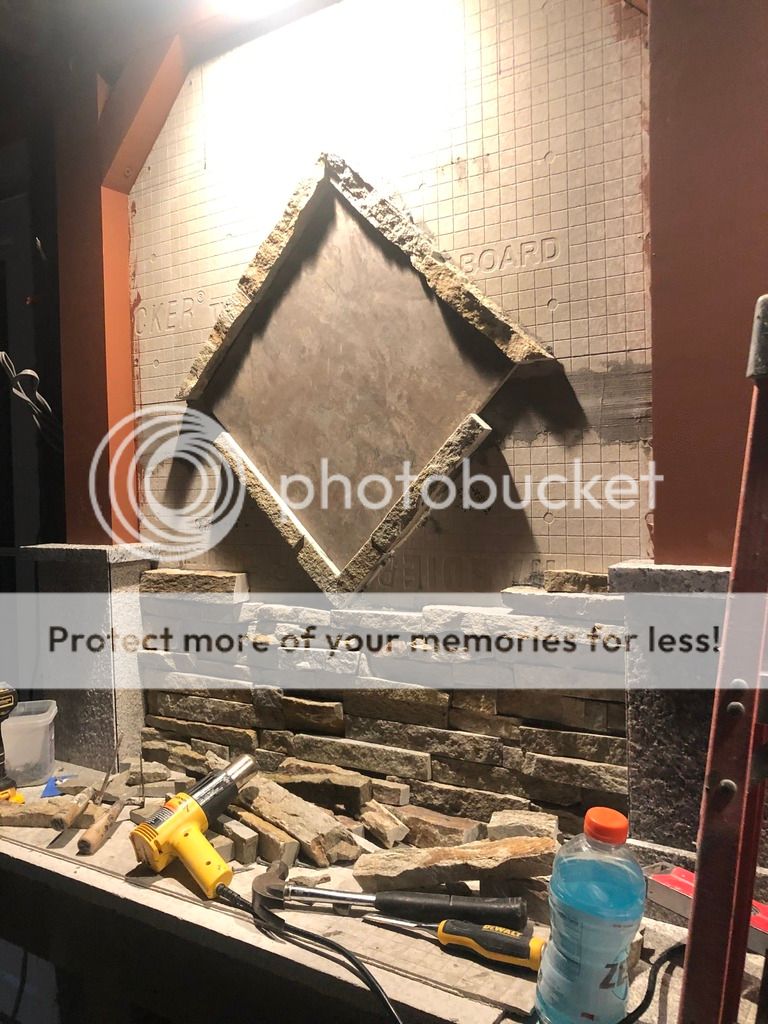
- Back framed with PT wood strips at each "bay" and installed cement board w/ detailed seams
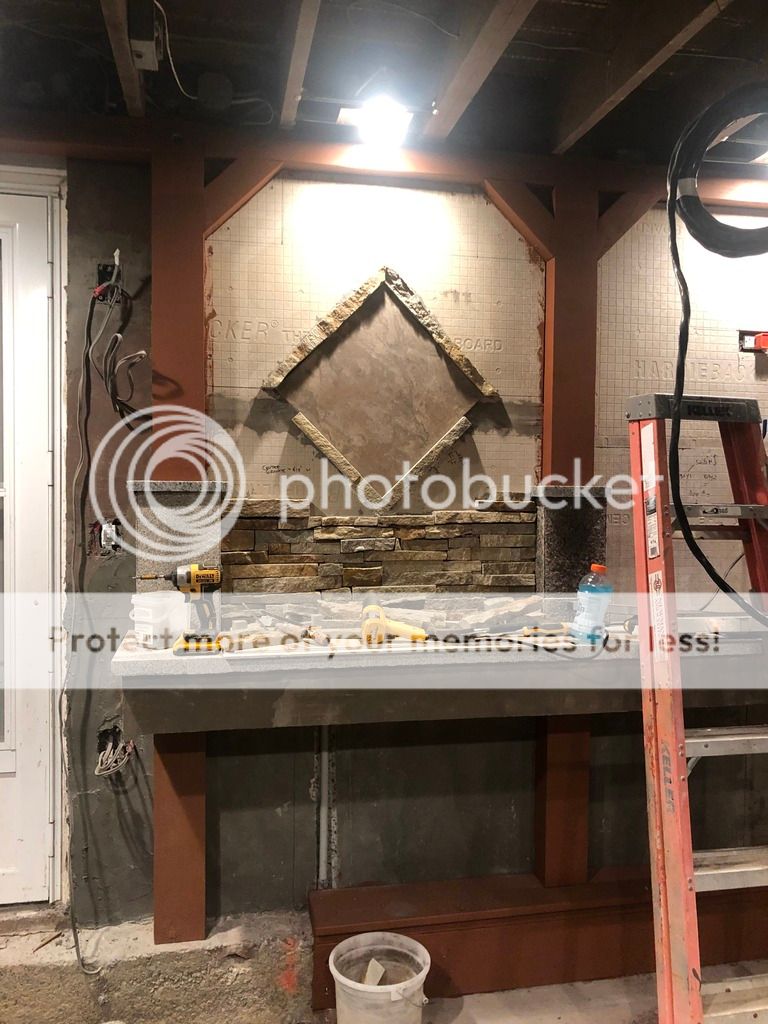
- Started applying Virgina split ledgestone pieces "stackstone"; there were some open joints, so I created custom mortar mix (dark) and backpointed open joints to prevent little critters/insects from making new homes. I didn't want crap flying out of the wall and landing on my bald head as I'm try to chill in the hot tub!
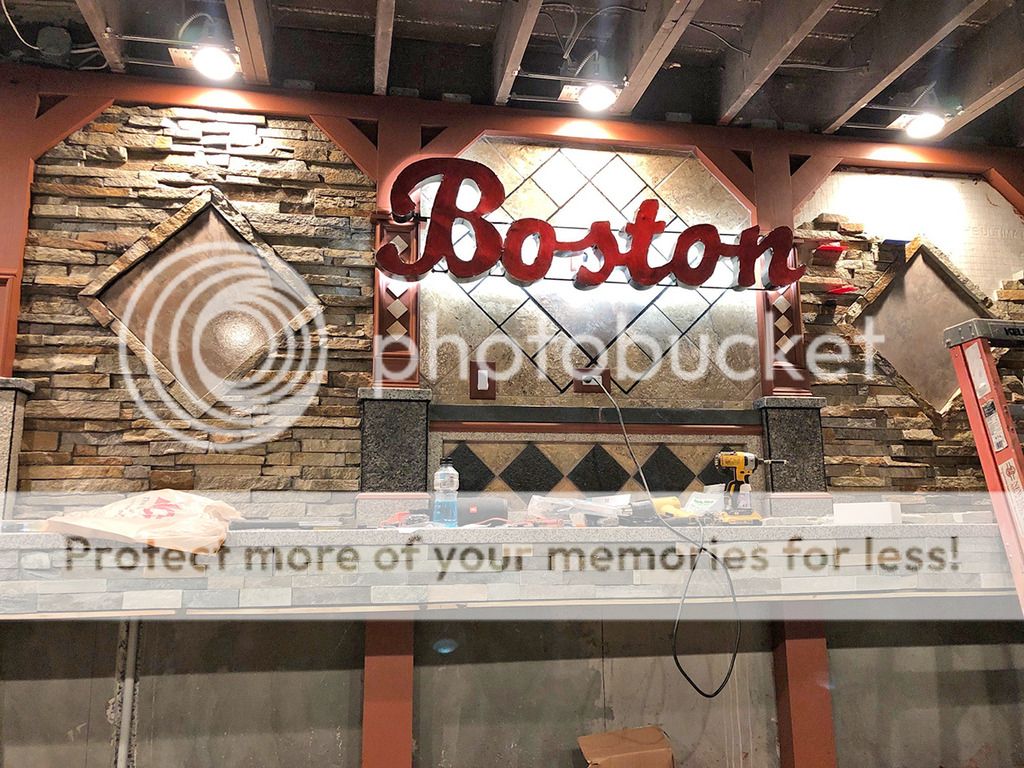
- Installed granite & porcelain tile at center bay, original elec outlet at upper middle was going to be for an "exterior grade TV" but after I saw the prices on them...and after what I've invested so far...that'll have to wait.
- Installed some detail wood work at portions of upper piers above granite. All out of PT and coated w/ (3) coated of 30 yr Behr solid color deck stain
- Installed my 3d custom welded metal sign that I installed waterproof led's in (pic at night and pic with all lights on
- I switched out (1) of the elec outlets at the center bay (the upper one) with a WIFI/app control, exterior rated outlet
- I switched out the (1) switch with a WIFI/app controlled dimmer that controls the lights directly above the shelf
- Installed a slightly colored "stackstone" at face of shelf
- Installed shellac gloss masonry sealer to all exposed masonry and tile
- Installed joint sealant/caulking with aggregate finish at all stone to stone joints to give the illusion of mortar joints


What's left may you ask? Quite a bit.
- I still have to backfill crush stone and stone dust and install the 2' x 2', 4' x 4', and brick granite pavers
- I still have to install a CMU block kneewall and piers and install the 6 x6 timber vertical posts at the outer edge of the deck. I also had some 3/8" thick
 custom truss plates made with drilled holes to keep those 6x6's nice and in place
- A few other misc things

I'll keep you guys posted.

Nick B - Middleton, MA

NBonugli

  • Junior Member
  • *
  • Posts: 26
Re: My Underdeck Hot Tub Project
« Reply #2 on: September 23, 2019, 09:20:46 am »
Finished rigging up under shelf front edge LED light strip (NTE waterproof 16' reel 600 count cool white led) and upward facing LED strips at the base of each bay this weekend. Once 100% completely done with the LED's I'll be running close to 32' of LED flex, so in turn the transformer needed to run them is an 8 amp 12v output power pack (similar size to what you see with a laptop). All LED strips are connected to a WIFI controlled receptacle that can be controlled via phone or through Alexa, and I have a turn knob dimmer that's easily accessible and hidden under the shelf as well. All wire connections are soldered with heat shrink tubing, no crimp connections here.


swilly1000

  • Full Member
  • ***
  • Posts: 307
Re: My Underdeck Hot Tub Project
« Reply #3 on: September 27, 2019, 08:43:00 am »
Yankee fan?

NBonugli

  • Junior Member
  • *
  • Posts: 26
Re: My Underdeck Hot Tub Project
« Reply #4 on: September 27, 2019, 09:07:06 am »
Swilly,
Yes and no. I respect the team...but Sox fan for good and bad.

swilly1000

  • Full Member
  • ***
  • Posts: 307
Re: My Underdeck Hot Tub Project
« Reply #5 on: September 27, 2019, 04:57:47 pm »
Surprised you have them any cred.  Lol

NBonugli

  • Junior Member
  • *
  • Posts: 26
Re: My Underdeck Hot Tub Project
« Reply #6 on: October 16, 2019, 01:27:11 pm »
Update:
October 15, 2019
Hot tub delivered...waiting on my electrician to do the final elec hookup.
This thing is a beast. Can't wait to fire it up. MS MP LSX900. I still have a bit to do, bringing grade up around tub by around 1' +, granite pavers going down, and a custom stair assembly that can be moved if need be to access control panel/inner workings of the tub (see sketchup pro picture).


Hottubguy

  • Ultimate Member
  • *****
  • Posts: 2150
Re: My Underdeck Hot Tub Project
« Reply #7 on: October 18, 2019, 10:12:26 pm »
Love the setup. You do all that work yourself?

NBonugli

  • Junior Member
  • *
  • Posts: 26
Re: My Underdeck Hot Tub Project
« Reply #8 on: October 21, 2019, 08:37:03 am »
Hottubguy, Yes sir. I'm a mason by trade since 1994 in a commercial union environment here in Boston.
I'm now in the inner office, from estimating projects... to now a Senior project manager.

NBonugli

  • Junior Member
  • *
  • Posts: 26
Re: My Underdeck Hot Tub Project
« Reply #9 on: October 21, 2019, 08:42:07 am »
Also, working on granite paver install. I try to do a little every night once I get home from work. These pavers aren't easy to work with, the bigger ones are a pain in a#*..the 16" x 16" aren't as bad (2.5' x 2.5' x 2.5" thick & 16" x 16" x 1 1/2" thick). Glad I have a Toro Dingo with forks to move stuff around. I'll post some pics once I get more done.

*Just put water in the tub last night using prefilter...Electrician comes later today to do final hookup. May the chemical water balance process start! One step closer to taking a dip.

Nick B.
Middleton, MA

NBonugli

  • Junior Member
  • *
  • Posts: 26
Re: My Underdeck Hot Tub Project - Update
« Reply #10 on: October 22, 2019, 07:59:30 am »
Tub up and running last night finally. Electrician had some issues get the spa shutoff breaker to trip..went crazy trying to diagnose it. Luckily I had another spare GFCI for the spa shutoff, he swapped it out and...viola! problem solved. Bad breaker right of the box from a Lowes $90 GE spa shutoff.
Alkalinity adjusted, PH adjusted, metal remover added last night. First thing this morning I added sanitizer. When I get home from work later today I'll check all levels once again and the tub should be up to temp (100 F); as of 6:00 est this morning it was 95 F. If everything checks out ok...Spa Marvel time. I'll add a bottle and let it work it's magic. As you can see from this pic..I started the granite pavers. Hopefully this upcoming weekend I can start the spa entry stair assembly.

Nick B - Middleton, Ma


swilly1000

  • Full Member
  • ***
  • Posts: 307
Re: My Underdeck Hot Tub Project
« Reply #11 on: October 23, 2019, 02:29:46 pm »
Can't wait to hear what you think about those jets!

A.O.

  • Full Member
  • ***
  • Posts: 171
Re: My Underdeck Hot Tub Project
« Reply #12 on: January 23, 2021, 07:08:06 am »
Nice looking project, how did it all come out??

Hot Tub Forum

Re: My Underdeck Hot Tub Project
« Reply #12 on: January 23, 2021, 07:08:06 am »


Home    Buying Guide    Featured Products    Forums    Reviews    About    Contact   
Copyright ©1998-2024, Whats The Best, Inc. All rights reserved. Site by Take 42